 Zhongshan city HaiShang Electric Appliances Co,. Ltd
 EN
EN



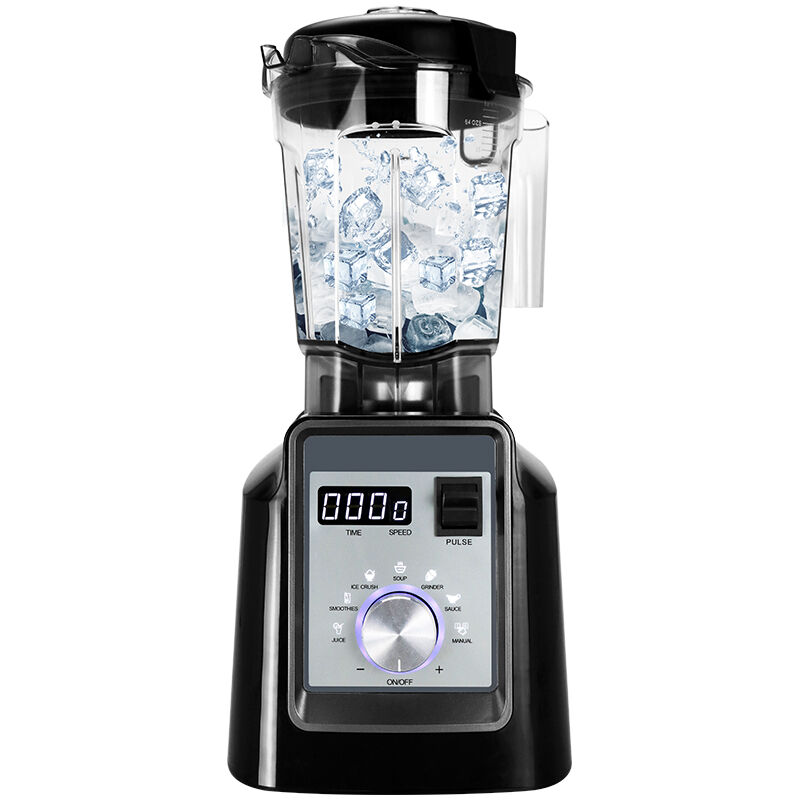
A Digital Blender is one of the most versatile and frequently used appliances in both commercial and home kitchen environments. Whether you are processing smoothies, soups, sauces, or laboratory samples, consistent performance depends heavily on how well you maintain the unit over time. Neglecting routine care can shorten the lifespan of your equipment and compromise the precision that makes a digital blender stand out from conventional alternatives.
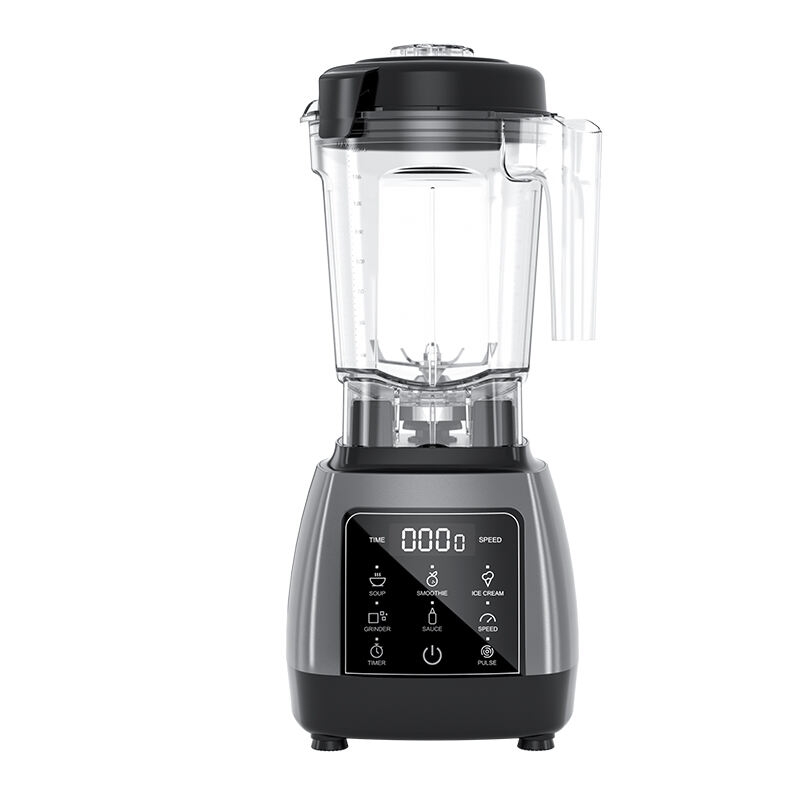
Keeping your digital blender in top working condition is not just about cleaning the jar after every use. It involves a systematic approach to maintenance that covers the motor base, the control panel, the blending components, and the storage environment. This guide walks you through the essential practices that professionals and dedicated home users rely on to extend the service life of their digital blender and ensure repeatable, high-quality results every single time they operate it.
Understanding the Components of a Digital Blender
The Motor Base and Its Role
The motor base is the operational heart of any digital blender. It houses the electric motor, the power regulation circuitry, and in most modern units, the digital control system that allows precise speed and timing adjustments. Understanding how this component works helps you make smarter maintenance decisions that protect the entire unit.
The motor generates significant heat during heavy blending cycles, especially when processing dense or fibrous materials. Heat dissipation is managed through ventilation slots built into the base housing. Keeping these vents clear of dust, food debris, and grease buildup is one of the most important and often overlooked maintenance tasks for a digital blender user.
When the motor base is kept clean and placed on a stable, level surface, it operates within its designed thermal thresholds. This directly reduces wear on internal bearings and windings, which are costly to repair or replace. A well-maintained motor base also responds more accurately to the digital controls, giving you the repeatable performance that distinguishes a digital blender from simpler models.
The Digital Control Panel and Touchpad
The control panel is the interface that sets a digital blender apart from analog versions. It typically features a touchpad or digital display that allows users to select speed levels, program blend cycles, and monitor operation time with precision. This electronic component requires specific care that differs from how you would treat mechanical dials or buttons.
Liquid infiltration is the primary threat to a digital control panel. Even small amounts of moisture seeping beneath the touchpad surface can cause short circuits or unresponsive controls. When cleaning the panel area of your digital blender, use a lightly dampened cloth rather than spraying liquids directly onto the surface. Always wipe in gentle, consistent strokes and avoid harsh chemical cleaners that can degrade the panel coating.
Regularly inspect the panel for signs of discoloration, bubbling, or unresponsive zones. Catching these early indicators allows you to address moisture exposure before it leads to more serious electrical damage. A properly protected control panel ensures that your digital blender continues to respond accurately to every command you enter.
Daily and Weekly Cleaning Practices
Post-Use Cleaning of the Blending Jar
The blending jar is the component that comes into direct contact with ingredients, making it the most visible maintenance priority for any digital blender owner. After every use, the jar should be rinsed immediately to prevent food particles from drying and adhering to the blade assembly or the inner jar walls. Dried residue is far more difficult to remove and can harbor bacteria in a food service environment.
For a thorough clean, fill the jar approximately halfway with warm water and add a small drop of dish soap. Secure the lid and run the digital blender on a low to medium speed setting for twenty to thirty seconds. This self-cleaning cycle uses the blending action itself to dislodge residue from around the blade hub and along the jar walls. Empty the jar, rinse thoroughly with clean water, and allow it to air dry inverted on a clean surface.
Avoid submerging the blending jar base that contains the blade coupling in standing water for extended periods. Prolonged submersion can degrade the blade bearing seal, leading to leaks and eventual blade assembly failure. For your digital blender to maintain leak-free performance, the gasket and seal should be inspected weekly and replaced as soon as any cracking or deformation is noticed.
Deep Cleaning the Motor Base and Exterior
The exterior of the motor base accumulates cooking splatter, dust, and fingerprints during regular kitchen operation. A weekly wipe-down with a soft, slightly damp cloth prevents surface grime from building up and migrating into the ventilation openings of your digital blender. Pay particular attention to the coupling socket where the jar connects to the motor shaft, as food debris in this area can affect the blade engagement and create uneven blending performance.
For the ventilation slots specifically, a soft-bristled brush or a can of compressed air is effective at clearing accumulated dust without introducing moisture into the motor housing. This practice is especially important in commercial kitchens where particulate matter in the air is higher than in residential settings. A digital blender used in a professional environment should have its vents cleared at least once per week as part of the standard equipment maintenance routine.
Never use abrasive scrubbing pads, steel wool, or solvent-based cleaners on any exterior surface of your digital blender. These materials cause surface micro-scratches that trap bacteria and accelerate cosmetic degradation. A clean, well-presented unit also reflects professionalism in commercial settings and ensures hygienic compliance in food processing environments.
Blade and Seal Maintenance for Lasting Performance
Inspecting and Caring for Blender Blades
The blades of a digital blender must remain sharp and properly aligned to deliver consistent blending results. Over time, blending hard ingredients such as ice, frozen fruit, or whole nuts can gradually dull the cutting edges. You can evaluate blade sharpness by observing the texture of blended output: if your digital blender is producing coarser results than usual despite adequate blending time, blade degradation may be the underlying cause.
Handle blades with protective gloves whenever you are removing them for inspection or deep cleaning. The blade assembly in most digital blender models is designed to be removable, which simplifies access for thorough cleaning and inspection. After removing the blade, check for visible nicks, bent tips, or uneven wear patterns that could indicate the blade has reached the end of its service life.
Blades that are damaged should be replaced rather than continued in service. Operating a digital blender with compromised blades places additional mechanical stress on the motor and coupling mechanism. Over time, this secondary stress accelerates wear on components that are significantly more expensive to replace than the blade assembly itself.
Gasket and Seal Replacement Schedule
The rubber or silicone gasket at the base of the blending jar creates the leak-proof seal that keeps liquid contained during operation. In a heavily used digital blender, this gasket experiences repeated compression, temperature variation, and chemical exposure from cleaning agents. The result is gradual material fatigue that, if not addressed, leads to leaks during blending cycles.
Inspect the gasket every two weeks in a high-frequency use environment, or monthly in moderate use situations. Look for flattening, cracking, discoloration, or any loss of elasticity. A gasket that no longer springs back to its original profile when compressed by hand is overdue for replacement. Most manufacturers supply replacement gaskets as standard spare parts, making this one of the most straightforward preventive maintenance tasks for a digital blender.
When replacing the gasket, ensure the seating groove in the jar is clean and free from residue before installing the new seal. A debris-contaminated groove will prevent the new gasket from seating properly, reintroducing the leak risk you aimed to eliminate. Consistent gasket maintenance keeps your digital blender performing reliably and protects the motor base from moisture damage caused by escaping liquids.
Operational Best Practices to Prevent Damage
Load Management and Blending Technique
How you load ingredients into your digital blender has a direct impact on motor stress and blade wear. Starting a blending cycle with the motor at full speed while the jar is loaded with heavy, solid ingredients creates a high-torque spike that stresses the motor shaft and coupling. The recommended technique is to add liquids to the jar first, then add solid ingredients on top, and always begin the digital blender on a low speed setting before gradually increasing to the desired level.
Respect the maximum fill line marked on the blending jar. Overfilling your digital blender forces the motor to work against excessive resistance and increases the likelihood of liquid escaping through the lid seal during operation. Consistent overfilling degrades both the motor and the jar assembly at an accelerated rate, shortening the operational life of your equipment.
When processing very hard or frozen ingredients, allow the digital blender to run in short cycles with brief pauses rather than running the motor continuously for extended periods. This interval approach gives the motor time to dissipate heat between cycles and prevents thermal overload. Most digital blender units with touchpad controls include a timer function that makes interval blending easy to manage with precision.
Storage and Environmental Considerations
Proper storage significantly extends the service life of any digital blender. Store the unit with the blending jar removed from the motor base and placed separately to prevent the jar gasket from remaining under compression when the appliance is not in use. Prolonged compression of the gasket in a stored position accelerates the material fatigue described earlier and shortens the replacement interval.
The storage environment should be dry, well-ventilated, and away from heat sources such as ovens, steam vents, or direct sunlight. Elevated ambient temperatures and humidity levels accelerate the degradation of electronic components in the control panel of a digital blender, and can also cause rubber seals to harden prematurely. A cool, dry storage location is a simple but effective way to protect your investment.
In commercial kitchens, consider using a protective cover when the digital blender is not in active use. A fitted cover prevents dust and grease particles from settling into the ventilation slots and the coupling socket between service periods. This small habit contributes meaningfully to the long-term reliability of the unit and reduces the frequency of deep cleaning sessions required to keep the motor base in good condition.
FAQ
How often should I replace the blade assembly in my digital blender?
The replacement frequency depends on usage intensity and the types of ingredients processed. In a commercial setting with multiple blending cycles per day, blade inspection every three months is advisable. For home use, an annual inspection is typically sufficient. Replace the blade assembly when you notice reduced blending quality, unusual vibration, or visible damage to the cutting edges of your digital blender.
Is it safe to wash the blending jar of a digital blender in a dishwasher?
Many digital blender jars are labeled as dishwasher-safe, but repeated dishwasher cycles can degrade the jar material, cloud the transparency, and shorten the lifespan of the blade seal gasket due to high-heat drying cycles. Hand washing with warm soapy water and the self-cleaning cycle method described in this guide is generally gentler and more effective at preserving the jar assembly over time.
What should I do if my digital blender starts making unusual noise during operation?
Unusual noise from a digital blender during operation typically indicates one of three issues: a loose blade assembly, a worn blade bearing, or debris caught in the coupling area between the jar and the motor base. Stop the unit immediately, allow it to cool, and inspect all components before resuming use. Continuing to operate a noisy digital blender risks further mechanical damage and potential safety hazards.
How do I prevent the touchpad of my digital blender from becoming unresponsive over time?
The most effective way to preserve touchpad responsiveness is to protect the panel from moisture and grease. Wipe the panel with a dry or lightly dampened microfiber cloth immediately after any splatter occurs. Avoid pressing the touchpad with wet fingers or sharp utensils. Storing your digital blender away from steam-generating appliances also helps prevent the gradual moisture accumulation that is the leading cause of touchpad degradation in kitchen environments.
Table of Contents
- Understanding the Components of a Digital Blender
- Daily and Weekly Cleaning Practices
- Blade and Seal Maintenance for Lasting Performance
- Operational Best Practices to Prevent Damage
-
FAQ
- How often should I replace the blade assembly in my digital blender?
- Is it safe to wash the blending jar of a digital blender in a dishwasher?
- What should I do if my digital blender starts making unusual noise during operation?
- How do I prevent the touchpad of my digital blender from becoming unresponsive over time?